|
Acrylic Portrait Painting Tutorial.
Acrylic Portrait Painting is not something I practice for its own sake. On the rare occasions I attempt a portrait I use oils. However acrylics are very handy for doing colour studies or simply as time savers because of their fast drying time. Some artists use them exclusively. I have tended to use them as study aids and for greeting cards. Of late I have turned to them more because of an injury to my arm. For this quick portrait I used Galeria brushes. They are stiff and this works well with fast drying acrylics. Hog brushes are also suitable but take more time to recover between cleaning. In this work I have used Flats 18, 2 and 4. Filbert 2 and Round 1. I used a Reeves Canvas Board for my Acrylic Portrait Painting. It came double primed but I added a titanium white layer for smoothness. You might also want to try acrylic white gesso for priming. I intend to do a tutorial in the near future using this primer and you will be able to see the difference and reason why gesso is a choice primer.
The Painting Normally I would tone down all the colours except for the face but the subject's clothing was very striking and even a little jarring. I decided to embrace the colours and accentuate them, really smacking the observer in the eye. This did mean I would need to make sure the face was very strong so it would hold its own against the clothes. With this in mind I decided to paint the clothes first. After a simple transfer of a spartan initial drawing made with tracing paper. I laid a wash of thin lemon yellow diluted with only water. This was more to do with judging the values of later layers of paint than anything to do with the process. It can be harder to judge colours, values and tones against white. This is certainly the case with me.
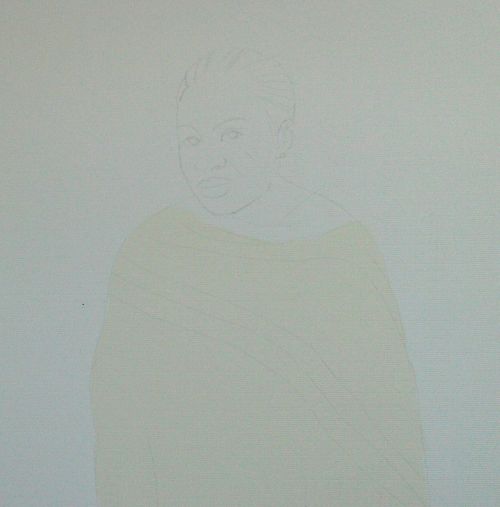
Now I divide the clothes up into base colours that I will paint ever thicker layers over. I used flow improver here and painted over the areas several times until I had a fairly smooth surface. To accomplish this I work the paint into the surface until there is little moisture left in it. W&N recommend 1 or 2 parts improver to twenty parts water. Two is better in my opinion. Paint light to dark, that is to say, darker tones over lighter ones. You do have some leeway with this rule because the nature of the paint allows us to paint over colours if we judge the strength of colour correctly. Some colours cover better than others but this is something I only discovered with practice. I use olive green, yellow ochre, crimson, paynes grey and sap green. I use flats 2 and 4 brushes. This is really a graphic technique rather than fine art but I think it will work well. I adjusted the colour on the second band up of the shawl. This is easy and quick with acrylics.
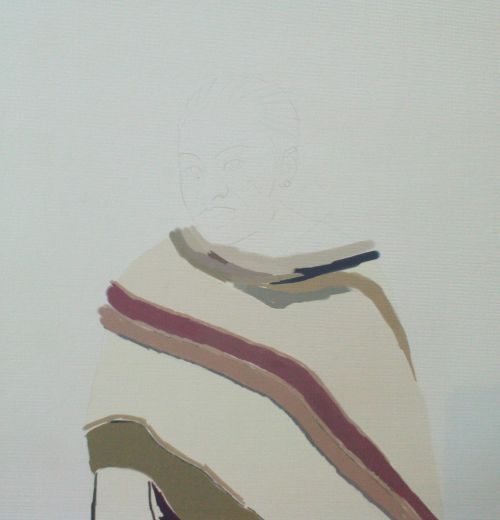
I adjusted the colour on the second band up of the shawl. This is easy and quick with acrylics. Now using paints straight from the tube with retarder I begin to add detailed patterns of the shawl with filbert 2. The retarder helps me to control the drying time of my Acrylic Portrait Painting which is important when modelling the patterns. I want to to dry after I am done with the paint. The paint goes on well because the base colours are flat and perfectly dry. Hooker’s Green Cobalt Green, Yellow Ochre Burnt Umber, Graphite Grey, Permanent Alizarin Crimson, Permanent Sap Green and Ivory Black.
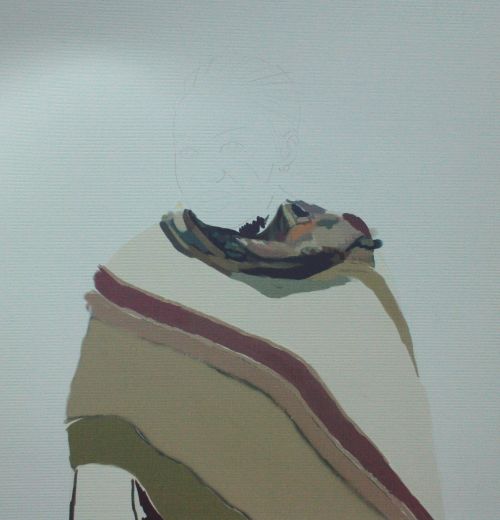
Same idea further down the shawl. I put the paint on quite thickly with a lot of pressure. I approximate colours, matching the actual colours as best I can with my range of paints. See my full list of colours on the painting with acrylics page.
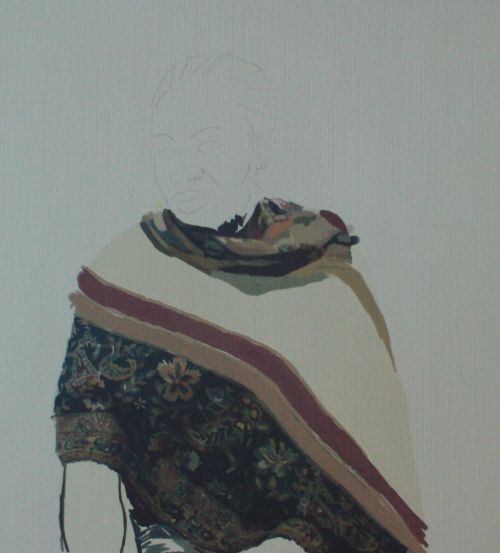
I continue adding detail with my round 1 and filbert 2 until satisfied.
Now I need to judge the strength of colours of the face properly or it will be lost against the strong patterns of the shawl. I use greys plus titanium white and ivory black to work out the form of the face. I am working with the flatbrush and laying down slabs and dashes of paint. I use the round brush 1 for the ear and earring.
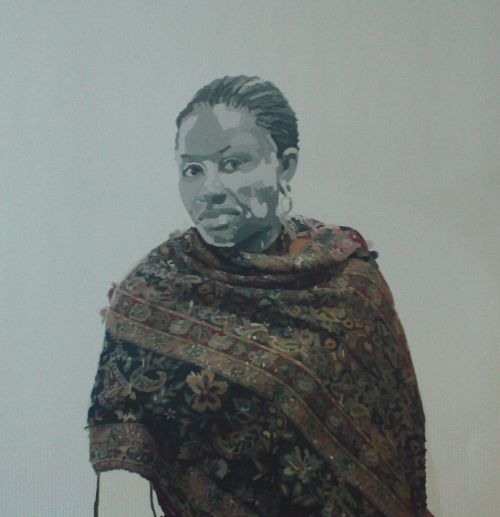
I darken the face until I think it holds up well and then turn to colour.
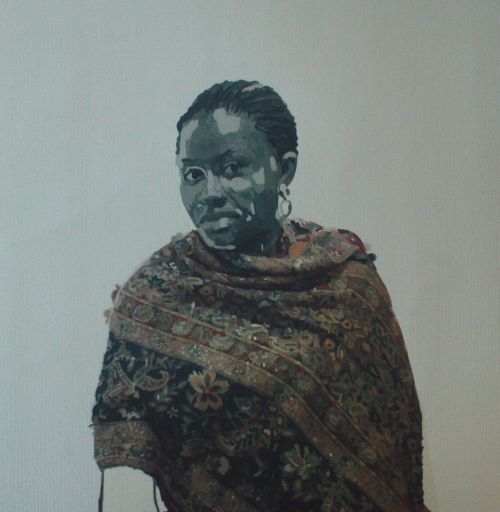
The colours aren't particularly natural. They are the same earthier colours I used for the clothes. A sort of flesh equivalent of the shawl. They are the same tones as the monotone or as close as I can make them. I am often asked how I mix flesh tones. The simple answer is, "I don't." Whether oils watercolours or Acrylic Portrait Painting. Faces and bodies reflect different colours depending on the environment, the lighting, the time of day. It is better to concentrate on the form of the face than the colour. The actual shape of a human face is more important than the colour. You will see greens as well as browns, purples, greys and blues in this painting. Let me be clear, the colours here are the same as some used in the shawl for effect. They harmonise a busy and even slightly over the top colour scheme BUT my advice on flesh tones stands. Form over colour always - and skin reflects any colour. Good things to keep in mind for Acrylic Portrait Painting or any other medium. I use the flats 2 and 4 and the filbert 2. The round 1 was used on the earing and other smaller details.
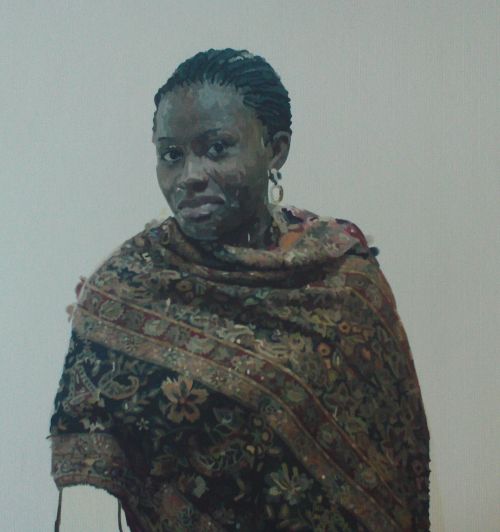
Finally I add a background colour, making it strong even though all my instincts are telling me to tone it down. I used a flat 18 mainly and a flat 4 to paint around the figure. Hooker’s Green, Quinacridone Gold and Lemon Yellow. I laid down a thin wash of lemon, then the green also considerably thinned down and finally a thick layer of the Gold straight from the tube.
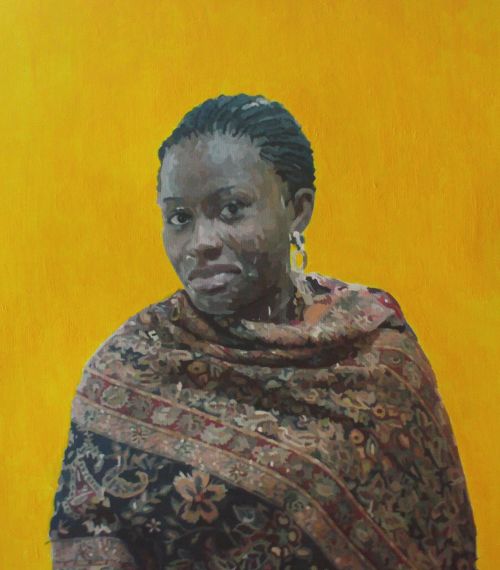
On the whole I am pleased with my Acrylic Portrait Painting. A credible portrait despite the strong patterns and colours. Perhaps a smoother background was called for but I am pleased with the colour. I think it brings out the face well. I learn everytime I paint. All our mistakes are mini lessons in how not to do it. Equally important as how TO do it! I hope as always you have enjoyed this tutorial on Acrylic Portrait Painting. I'd be delighted to hear from you about you and your work.
Return to Painting With Acrylics, from Acrylic Portrait Painting Home
|


