|
Oil Painting Techniques #6 - Glazing
Make this your number one Oil Painting Technique. I cannot overemphasize the importance of glazing. Correct glazing makes paintings appear to glow. It is the one technique that I can't say is easy but it is certainly doable and once you are comfortable with the principle you will be able to develop amazing skills. I advise constant practice for everyone at any level of ability and skill. There are so many colours, so many tones and the consistency of paint can be so varied that no one can possibly know exactly how each and every glaze will affect another. You will find this aspect of painting exciting, possibly nerve-wracking but always rewarding. Glazing means laying down layer upon layer of thin, transparent paint. Light passes through the top layer and reflects off the lower layer or layers. This bounces back to the viewers eye and this is why it is not possible to achieve the effects of glazing by mixing paint on your palette. No amount of mixing or buying up every colour in the catalogue can replace this aspect of painting. Mix any yellow with an equal measure of white spirit. This does work with linseed too but we want your paint to dry fast so we can get on with the lesson. Paint any shape you like. I have painted a simple square. Now paint the same shape in red at the side of the first colour as shown below. 
When your shapes are dry, paint the same red on your yellow shape. Immediately you begin to see the difference the second glaze has made. 
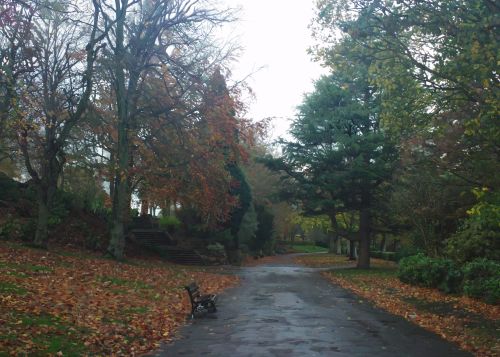
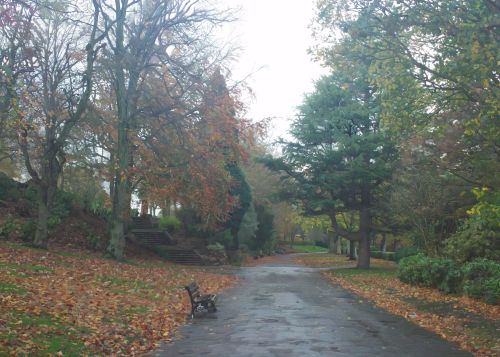
Which is more attractive? The red over yellow is more vibrant, more alive than the exact same shade of red on the right. Your eyes are combining the two colours making something entirely different. That is the power of glazing and you have just learned an important lesson that will help transform your art if you've already started painting, or put you on the correct path if you are new to it. Now you need to go and practice this technique without any examples from me or anyone else. You can do it! The very brief demonstration I have shown you is your starting point. The rest is up to you.Let your own version of what I have shown you dry and apply another layer or try a different colour. Practice with all colours and different strengths until you have a comprehensive library of glazing effects. Take written notes and store them away for later. You will reap the rewards I can promise you. Spend as long as it takes to get familiar with the method. Time spent now will give you the tools to make your future art really work for you and perhaps more importantly, for your future, cash carrying clients. Ok, now I'll show you one of my own paintings where one of my Oil Painting Techniques glazing came to my rescue. In this landscape painting I did my job too well and recreated the colours of my scene so accurately that the end result was too dark. 
To remedy this I washed over the entire painting except the sky area, with three, very thin layers of cadmium yellow. This lifted the overall tone to help create an autumnal feel. I also used a slightly stronger single layer on the fallen leaves. Compare the two images before and after. The difference, you will agree, is both subtle and surprising. The result? Job well done! Happy client! Happy me when I banked the cheque!

Home Back to Oil Painting Techniques for more Free Tutorials
|


